Drawing:ic8dkh2jtsc= Fire is one of the most captivating artistic challenges. Fire, with its unpredictable nature and mesmerizing movement, has long been a subject of fascination for artists. Whether you’re a beginner looking to enhance your skills or an experienced artist wanting to capture the essence of fire, mastering this element can take your artwork to new heights.
But why is fire such a popular subject in art? It’s not just about its beauty—it’s the symbolism, the power, and the dynamic energy that fire represents. Learning how to draw fire opens the door to portraying not only literal flames but also the intensity and emotion behind them.
Understanding the Nature of Fire
Before we dive into the drawing process, it’s essential to understand the basic nature of fire. Fire is a chemical reaction that produces light and heat, and its appearance can vary depending on its fuel source, temperature, and environment.
The Scientific Elements of Fire
At its core, fire is a combustion process that results from a mixture of heat, fuel, and oxygen. Understanding how these elements interact can help you predict how behaves in your Drawing:ic8dkh2jtsc= Fire. The shape, size, and movement of fire all stem from these interactions.
Why Fire Moves the Way It Does
Fire is constantly in motion. Whether it’s a flickering candle or a roaring wildfire, fire flows with the wind, reacts to heat, and constantly changes shape. Capturing this movement in your drawings is key to creating a lifelike image.
Tools and Materials Needed for Drawing Fire
To effectively Drawing:ic8dkh2jtsc= Fire, you’ll need the right set of tools. Whether you’re using traditional media like pencils and paper or going digital, selecting the correct materials will make a big difference in your results.
Essential Art Supplies
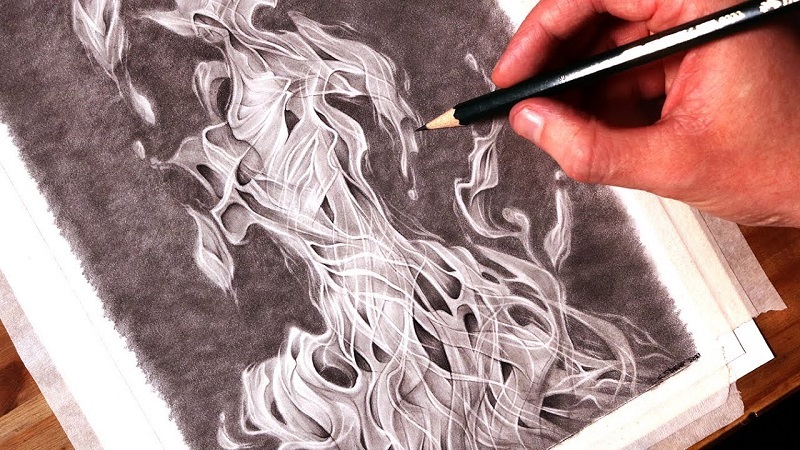
For traditional drawing, the basics include high-quality pencils, blending tools, and smooth paper that can handle shading and layering. Charcoal pencils are particularly useful for creating dark shadows, while colored pencils or pastels can bring the flames to life.
Choosing the Right Type of Pencils and Paper
A range of pencils, from hard to soft (H to B), allows for detailed sketching and shading. Smooth or medium-textured paper works best for blending colors seamlessly, which is crucial for drawing realistic flames.
Traditional vs. Digital Tools
If you prefer digital drawing, programs like Adobe Photoshop or Procreate offer powerful tools for creating fire. Digital brushes can mimic the soft, flowing quality of flames, and blending modes can help achieve smooth transitions between colors.
Breaking Down the Anatomy of Fire
The Flame’s Structure: Core, Middle, and Outer Flames
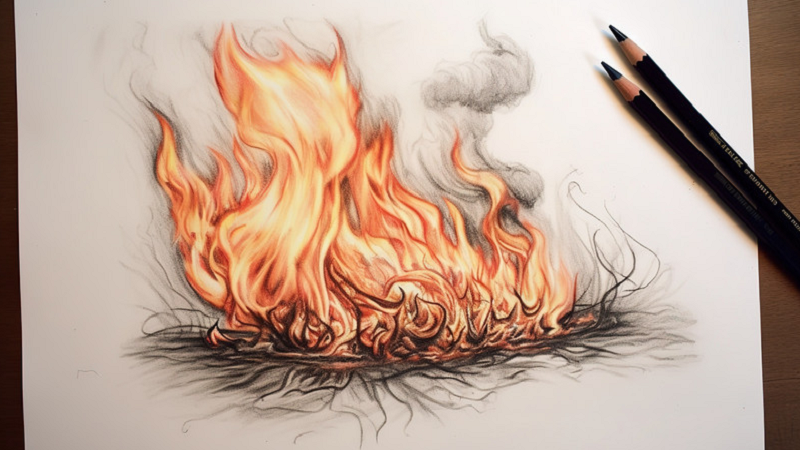
Fire is not just a mass of flickering light—it has a distinct structure. The core of the flame is the hottest part and often appears blue or white. The middle flame is warmer and glows yellow or orange, while the outer edges of the flame are cooler and fade into red.
Understanding the Colors of Fire
Colors are essential to conveying the temperature and intensity of fire. Bright yellows, oranges, and reds are common, but cooler flames may incorporate blues and whites. Understanding this range will help you choose the right colors for your drawing.
Heat Source and Flame Interaction
The appearance of fire can vary based on its heat source. A candle flame differs significantly from a campfire or wildfire. Knowing how the heat source influences the flame’s movement and intensity is vital when Drawing:ic8dkh2jtsc= Fire in different contexts.
Step-by-Step Guide to Drawing Fire
Sketching the Basic Flame Shape
Start by drawing simple, flowing lines that mimic the upward movement of fire. Avoid sharp, rigid lines—fire is organic and constantly changing.
Refining the Edges for a Realistic Look
Once your basic shape is sketched, smooth the edges, allowing some areas to taper off while others flare out. This will give your flame a more natural and fluid appearance.
Adding Details for Dimension and Movement
To create dimension, focus on layering different parts of the flame. Some areas will be more opaque, while others are more transparent. This layering effect will give the illusion of depth and movement.
Adding Colors to Your Fire Drawing
Color is crucial to fire’s realism. Use lighter shades for the inner parts of the flame and darker tones for the outer edges. Blend the colors softly to avoid harsh transitions, creating a gradient effect.
Shading and Lighting
Shading helps add depth and volume to your fire drawing. Consider the light source and how it interacts with the environment. Flames often cast a soft glow, so remember to incorporate that into your shading technique.
Common Mistakes in Drawing Fire
Overcomplicating the Design
One common mistake is trying to over-detail the flames. Fire is fluid and should be represented with simplicity. Avoid too many sharp lines and excessive details.
Misusing Colors and Shading
Another frequent error is misusing colors. Be mindful of how colors transition within the flame. A harsh divide between bright yellows and deep reds can make the fire look unnatural.
Fixing These Mistakes
Correcting these errors is often a matter of simplifying the design and refining color transitions. Practice makes perfect, and even small adjustments can lead to dramatic improvements.
Drawing Fire in Different Settings
Campfires, Candles, and Torches
The type of fire you’re drawing will impact its shape and intensity. A small, contained candle flame is much simpler than the roaring complexity of a bonfire. Pay attention to the differences in movement and shape.
Wildfires and Cityscapes
For larger scenes like wildfires or city fires, focus on scale and movement. Wildfires are chaotic and fast-moving, while a fire in an urban setting might involve more structured flames due to the man-made environment.
Fire in Fantasy Art
If you’re working on fantasy art, fire takes on a whole new level. Dragons breathing flames, enchanted wizards casting fire spells—these offer exciting opportunities to get creative with colors and movement.
Practicing and Perfecting Your Fire Drawings
Practice Exercises for Mastering Fire
To truly master fire, practice is essential. Try sketching different types of fire in various settings and experiment with different tools, whether traditional or digital.
How to Stay Consistent with Improvement
Consistency is key. Keep challenging yourself with new fire drawings, and over time, you’ll notice a significant improvement in your ability to capture the fluid, dynamic nature of flames.
Conclusion
Drawing:ic8dkh2jtsc= Fire is one of the most exciting and challenging elements to capture in art. Whether you’re drawing a small flame or a raging inferno, the key to success lies in understanding the movement, structure, and color of fire. With the right tools and practice, you can create stunning, lifelike representations of this powerful force. Read More lifestyledod.
FAQs
1. What is the easiest way to start drawing fire?
Start by sketching the basic shapes and movements of fire with simple lines and focus on the flow of the flame.
2. How do I choose the right colors for fire?
Use a combination of yellows, oranges, reds, and hints of blue for realistic flames, blending them for a smooth transition.
3. What is the best way to add movement to fire in a drawing?
Focus on fluid, flowing lines and vary the thickness and direction of the flames to create dynamic movement.
4. How can I draw fire digitally?
Use digital brushes that mimic soft edges and blending modes to achieve a smooth transition between colors in programs like Procreate or Photoshop.
5. What are some advanced techniques for drawing fire?
Experiment with layering different colors and adjusting opacity to create depth. Practice shading and lighting to enhance realism.